Category: Uncategorized

Is It Important For My Home’s Floors to Match?

When it comes to home design, one of the most important decisions you will make is what flooring to choose. Flooring can really set the tone for a room and it’s important to select a style that will match your other decor. But what if you can’t find the perfect flooring to match?

Is it still possible to have a cohesive look in your home? In this blog post, we will explore the importance of matching flooring and provide some tips on how to achieve a coordinated look in your home even if your floors don’t quite match.

Consider the Cohesiveness

One of the most important things to consider when choosing flooring is how it will work with the other elements in your home. If you have a lot of wood furniture, for example, you might want to choose a wood floor that will complement it.

Alternatively, if you have very modern furniture, you might want to select a more contemporary flooring option. It’s important to think about the overall “look” you are going for in your home and what flooring will help you accomplish that “look”.

Think “blend and contrast”. The last thing you want is for your flooring to clash. The transition between two different types of flooring can be quite jarring if they are too different. If you have a hardwood floor in your living room and carpet in your bedroom, for example, try to find a carpet that has similar colors to the hardwood. This will help create a more cohesive look in your home.

Match the Flooring or Go for Contrast?

Source: Unsplash

Once you have considered the overall cohesiveness of your home, it’s time to decide whether you want to match the flooring or go for contrast. If you want to create a seamless look, matching the flooring is probably the best option.

This can be especially effective in open concept homes where different rooms flow into one another. By having matching flooring throughout the space, you can create a cohesive look that ties the whole home together.

On the other hand, if you want to create a more unique look, you might opt for contrasting flooring. This can be a great way to add interest to your home and make it feel more dynamic. If you choose to go this route, just be sure that the different flooring options complement each other and don’t clash. A good rule of thumb is to choose two different but complementary flooring options that are in the same color family.

Tips for Mixing and Matching Flooring

Source: Unsplash

If you can’t find the perfect flooring to match or you simply want to mix and match different styles, there are a few things you can do to ensure a cohesive look. One option is to choose one flooring style for the main living areas of your home and then use a different but coordinating style in more private spaces like bedrooms and bathrooms.

Another option is to use similar flooring throughout your home but in different colors or finishes. For example, you could use hardwood floors in your living room and kitchen but in different stains or finishes. Or, you could use the same tile throughout your home but in different colors or patterns. There are endless possibilities when it comes to mixing and matching flooring, so get creative!

Mistakes to Avoid When Mixing Flooring

While there are many ways to successfully mix and match flooring, there are also a few mistakes you’ll want to avoid.

Too Many Styles

One mistake is choosing too many different flooring styles. If you have too many different types of flooring, your home will look cluttered and busy. Instead, stick to two or three different flooring styles and use them throughout your home in a cohesive way.

Clashing Colors

Another mistake to avoid is choosing flooring colors that clash. This can happen if you choose two different flooring options that are in the same color family but have very different undertones.

For example, pairing a cool gray floor with a warm brown floor can create a clash that is very noticeable and off-putting. Instead, try to choose two different colors that have similar undertones.

Keep Carpets Away From Kitchens

If you’re going to have both carpets and hardwood floors in your home, it’s important to keep the carpets away from the kitchen. Carpets can be difficult to clean, and if you have spills or other accidents in the kitchen, they can be very hard to clean up.

Instead, stick to hardwood, tile, or laminate in the kitchen and save the carpet for other areas of your home.

Attempting to Create Contrasts That Are Too Extreme
Creating contrasts is a great way to add interest to your home, but you don’t want to go too extreme. For example, pairing a very dark floor with a very light floor can create a contrast that is too extreme and can make your home feel jarring and uncomfortable.

Instead, try to choose two different but complementary flooring options that are in the same color family. This will create a more subtle contrast that is stylish and sophisticated.

Poor Quality Flooring

When mixing and matching flooring, it’s important to make sure all of the flooring options you select are high quality. Choosing one high-quality flooring option and pairing it with a lower quality option will create a noticeable difference that can make your home look cheap.

To avoid this, only choose flooring options that are made from high-quality materials and that will stand the test of time.

Some Floors Just Don’t Match

There are some floors that just don’t go together, no matter what you do. If you’re having trouble finding two flooring options that match, it’s probably best in that situation to choose one flooring style for your entire home. This will create a cohesive look that is much more stylish and sophisticated than two mismatched floors.

Source: Unsplash

The Bottom Line

There is no right or wrong answer when it comes to whether or not your home’s floors need to match. It really comes down to personal preference and the overall look you are trying to achieve.

If you want a cohesive look, matching flooring is probably the best option. But if you’re looking for something more unique, mixing and matching different flooring styles can be a great way to add interest to your home.

Whatever you decide, be sure to consider the overall cohesiveness of your home and choose flooring that will complement your other decor. With these tips in mind, you can achieve a coordinated look in your home that you love!

Learn how to get your own beautiful floors here.

The Best Hardwood Floor Options For Your Kitchen

When it comes to renovating your kitchen, the floor is an often overlooked aspect. Many people simply choose to go with whatever is cheapest or easiest. But when you put in a little extra effort, you can create a beautiful and unique floor that will really stand out.

There are many different hardwood flooring options available on the market today. You can choose from a variety of colors, textures, and finishes. But with so many choices, it can be difficult to know where to start. That’s why we’ve put together this guide to help you choose the best hardwood floors for your kitchen.

Engineered or Solid Hardwood Floors

One of the first decisions you’ll need to make is whether to go with engineered or solid hardwood floors. Engineered hardwood floors are made up of a core of plywood or HDF, topped with a thin layer of hardwood veneer. Solid hardwood floors are exactly what they sound like – they’re made entirely of solid wood.

There are a few things you’ll need to consider when making this decision. First, engineered hardwood floors are more stable than solid hardwood floors. This means that they’re less likely to warp or cup over time. If you live in an area with high humidity, this can be a big advantage.

Second, engineered hardwood floors are often thinner than solid hardwood floors. This can be a good thing or a bad thing, depending on your needs. If you’re looking to install the flooring over an existing floor, thinner floors may be a better option. However, if you want your floors to have a more substantial look and feel, you may prefer solid hardwood floors.

Finally, engineered hardwood floors are typically more expensive than solid hardwood floors. If cost is a major consideration for you, solid hardwood floors may be the better option.

What Type of Finish Should You Choose?
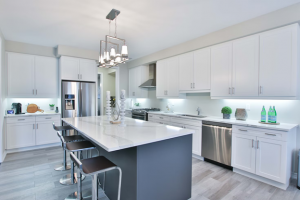
Source: Unsplash

Once you’ve decided on engineered or solid hardwood floors, the next step is to choose a finish.
The type of finish you choose will have a big impact on the overall look and feel of your floors. It’s important to take some time to think about the style you’re going for before making a decision.

Because a kitchen’s hardwood flooring has above-average exposure to frequent use and abuse, the finish you pick is particularly vital. Since there’s a high chance water will get on the floor, your finish has to be waterproof. It also must be strong enough to endure the heavy foot activity that a kitchen receives.

Oil-Based Finish

One popular option is an oil-based finish. Oil-based finishes give hardwood floors a natural, warm appearance. They’re also easy to touch up and repair if they get scratched or damaged. Another advantage of oil-based finishes is that they’re very durable. They can withstand a lot of wear and tear, making them a good choice for high-traffic areas.

Water-Based Finishes

Another popular option is a water-based finish. Water-based finishes provide a harder, more durable surface. However, they can be more difficult to touch up and repair than oil-based finishes. Water-based finishes are also easier to apply than oil-based finishes and are less likely to yellow over time.

Wax Finish

If you’re looking for an old-fashioned look, you might consider a wax finish. Wax finishes are easy to apply and provide a beautiful, natural sheen. However, they require more maintenance than other types of finishes and can be difficult to repair if damaged. Wax finishes are also more susceptible to scratches and scuffs.

Polyurethane Finish

For a high-gloss, durable finish, you might want to choose a polyurethane finish. Polyurethane finishes are more resistant to scratches and stains than other types of finishes. However, they can be more difficult to apply and may yellow over time.

Moisture-Cure Urethane

If you’re looking for a finish that’s extremely durable and resistant to moisture, you might want to choose a moisture-cure urethane. Moisture-cure urethanes are more difficult to apply than other types of finishes. They also have a strong odor and can be dangerous if used improperly.

Shellac

Shellac is a type of finish that’s made from lacquer. It’s easy to apply and dries quickly. However, it’s not as durable as other types of finishes and can be difficult to repair if it’s damaged. Shellac is also more susceptible to scratches and scuffs.

Penetrating Oil Sealer

A penetrating oil sealer is a good choice if you want to protect your floors from water damage. Penetrating oil sealers soak into the wood, creating a barrier that prevents water from damaging the floors. However, penetrating oil sealers don’t provide as much protection from scratches and scuffs as other types of finishes.

Acid-Cured Finish

An acid-cured finish is a good choice if you’re looking for a durable, high-gloss finish. Acid-cured finishes are more difficult to apply than other types of finishes. They also have a strong odor and can be dangerous if used improperly, as well as being more susceptible to scratches and scuffs.

Prefinished Flooring

Prefinished flooring is a great option if you want to avoid the hassle of applying a finish to your floors. Prefinished flooring comes with a factory-applied finish that’s already dried and cured. Prefinished flooring can be a bit pricier, however you save time and money with flooring that is already finished. This option allows you to enjoy your new floors immediately.

Which Type of Flooring is Best for Your Kitchen?

Now that you know a little bit more about the different types of hardwood floors available, it’s time to decide which one is right for your kitchen.

If you’re looking for a durable, easy-to-maintain floor, engineered hardwood or a water-based finish might be the best option for you. If you’re looking for a more traditional look, solid hardwood or a wax finish might be the way to go. And if you’re looking for a high-gloss, durable finish, polyurethane might be the right choice. If you’d like to be able to enjoy your floors immediately without the hassle of applying a finish, prefinished flooring is your best option. It all depends on what you’re looking for in your kitchen’s flooring.

Chances are, you probably don’t know exactly what you want yet. The best thing you can do in this situation is to contact our team for a custom, free consultation. We would love to help you.

Should You DIY or Hire a Professional?
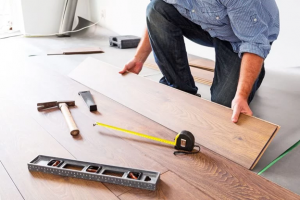
Source: Unsplash

Once you’ve decided on the type of hardwood floors you want, you’ll need to decide whether to install them yourself or hire a professional. If you’re handy and have some experience with home improvement projects, installing hardwood floors yourself can be a great way to save money.

However, hardwood floors can be tricky to install. If you’re not confident in your ability to do it yourself, hiring a professional is your best option. Not only will they be able to get the job done quickly and efficiently, but they’ll also be able to offer advice and guidance if you run into any problems.

Final Thoughts

When it comes to choosing the best hardwood flooring for your kitchen, there are a lot of factors to consider. But with so many great options available, you’re sure to find the perfect floors for your home. Just take your time, do your research, and pick what works best for your unique needs.

Now that you know more about the different types of hardwood floors available, you can start planning your kitchen renovation. With a little bit of research and planning, you can create the perfect space for cooking, entertaining, and spending time with family and friends. So what are you waiting for? Get started today!

Blackgum: Water-loving tree produces honey & wood products

Blackgum, also called black tupelo, tupelo gum, or just tupelo, is a tree that loves to grow in water and water-soaked soils. In fact, the genus Nyssa is the name of a water nymph. The tree grows throughout the eastern states, from Maine to Texas. Tupelo, Miss., (Elvis’ birthplace) was named after this tree. A close relative is water tupelo (Nyssa aquatica) which has nearly the same characteristics. Honey from water tupelo is highly prized. The tree in the forest is often 3 feet in diameter and 80 feet tall. Some of the trees are more than 400 years old. Unlike most trees, the tupelo trees are either male or female, with flowers being abundant on the female trees. It is not unusual for the larger, older tree to be hollow due to decay fungi; yet the tree can live with this condition for hundreds of years.

The wood itself is characterized by interlocked grain (the grain swirls every which way), which leads to warp when drying, warping in use when the MC changes, and difficulty when machining. In the past, blackgum was used for oxen yokes and chopping bowls due to the toughness resulting from the interlocked grain. Today, although this is not an outstanding, beautiful appearing species, it still is widely used for furniture, cabinets, caskets, and railroad ties. Carvers of duck decoys also appreciate this wood.

Processing suggestions and characteristics

Weight: Blackgum has a dry specific gravity (SG) of 0.52. The weight, when dry, is 32 pounds per cubic foot or about 2.6 pounds per board foot.

Strength: For dry wood, the ultimate strength (MOR) is 9,600 psi, stiffness (MOE) is 1.20 million psi, and hardness is 810 pounds. Interlocked grain means that splitting is very difficult. Nailing is also difficult, as the interlocked grain wants to change the nail’s direction. Pre-boring holes for nails and screws can be helpful.

Drying and stability: The wood dries with considerable difficulty due to warp, especially twisting. End coating is suggested, even with 4/4 stock. Shrinkage in drying is moderate. Overall shrinkage from green to 6 percent MC is 6.2 percent tangentially (the width in flatsawn lumber) and 3.5 percent radially (the thickness of flatsawn lumber). Once dried, the wood does move slightly if there are large RH changes or if the MC is not matched to the environment’s EMC conditions. A typical, desired, final moisture range is 6.0 to 7.5 percent MC. Once dry, it takes a 4.5 percent MC change to result in 1 percent size change tangentially and 8 percent MC change radially. 

Machining and gluing: This wood machines moderately well, with some chipped grain due to the interlocked grain. If over-dried, the wood appears to be quite brittle. Sharp tools are essential. This wood glues without much difficulty if surfaces are perfectly flat. However, if the MC changes and the pieces warp a small amount, it is difficult to obtain high-strength joints.

Grain and color: The wood, which is mostly heartwood, is grayish brown to a light brown with hints of yellow at times. The finished surface is smooth, but without natural luster. If the lumber is quartersawn, blackgum exhibits a very attractive figure. The wood is odorless. However, when the tree is bacterially infected, sawn wood will have a putrid odor and is noticeable (and objectionable) in dry wood products especially when the humidity is high.

This post appeared first on http://www.woodworkingnetwork.com

Black locust: Decay resistant, tough & durable

Black locust is a member of the legume family; it can “fix nitrogen” in the soil. It is native to the Appalachian Mountains, from Pennsylvania to Alabama. However, in the last century, it has spread to almost every state. With a widespread, shallow root system, it is ideal for thin soils where it will prevent soil erosion; it is often used for strip-mine reclamation projects barren due to mining debris and acid soils.

The tree has long thin bean-like pods. (Do not confuse black locust with honey locust. They are not related.) The flowers are very sweet smelling during the early spring, and the pollen and nectar are used by bees to produce excellent honey.

High natural decay resistance of the wood has resulted in frequent use of black locust for fencing. It also was the popular species for the pins that held glass insulators on the cross-arms of electric and telegraph/telephone poles. It also was the prized species for wheel hubs for wooden wheels, such as used on the western covered wagons. Xylophone keys are another use. Today, this wood has fallen into neglect within our industry (lumber prices are often low, especially for cabinet grades; dry firewood is a common use). It deserves better treatment.

The tree is short-lived, so it does not grow to large sizes; a large tree would be 24 inches in diameter at the base and 50 feet tall. Wide, clear pieces of black locust lumber are not common. A wood boring insect often invades the tree. A leaf miner often turns entire hillsides into brown-leafed, “dead-looking” trees for a week or so in the summer, but this damage is not fatal.

Processing suggestions and characteristics

Weight. This is a fairly heavy wood, more than 10% heavier than red oak. The weight, when dry, is 50 pounds per cubic foot or about 4 pounds per board foot.

Strength. Black locust is one of the strongest, hardest native American species.  For dry wood, the ultimate strength (MOR) is 19,400 psi, stiffness (MOE) is 2.05 million psi and hardness is 1,700 pounds. Mechanical fastening is difficult because of a tendency for splitting. Predrilling for nails and screws is advisable.

Drying. The wood dries slowly with some risk of checking, end splitting, and warping. Slow shed air-drying should be followed by kiln drying. Shrinkage in drying is moderately high. Overall shrinkage in drying from green to 6% MC is 7.2% tangentially (the width in flatsawn lumber) and 4.6% radially (the thickness of flatsawn lumber).

Stability. A typical final MC range is 6.0 to 7.5%, unless used in a humid location. It takes a 4% MC change to result in a 1% size change tangentially and a 6% MC change radially.

Machining and gluing. This wood machines with difficulty due to its hardness. This wood glues with some difficulty.

Grain and color. The heartwood is often quite green when first cut, but ages quickly to a russet brown color. The grain is moderately fine, but the annual rings are obvious and add character to the appearance.


This post appeared first on http://www.woodworkingnetwork.com

Tips to Save Money on Your Next Flooring Job

With the daily cost of living continuing to rise at a record pace, many households are budgeting more cautiously. Maintaining your home is the best way to protect your investment and add to your equity. With that in mind, your floor is something that has a major impact on your property value. So, what steps can you take to save money on your next flooring job?

Get a Few Different Estimates

Many of us are guilty of not familiarizing ourselves with the median cost of a job before hiring someone to do it. You can benefit from detailing your needs in writing and then articulating these needs over the phone or by email to several different companies to get quotes. In addition, you should attempt to find information online about the average cost for the type of job that you need.

Avoid creating a bidding war between several different companies as the process can become complicated. However, companies often have a little bit of wiggle room on pricing. Getting a few different estimates can help you make an informed decision about what company you want to proceed with.

Don’t Simply Pick The Cheapest Option

source: Unsplash

It’s definitely tempting to get your estimates and then immediately gravitate to the cheapest option. Do some digging on the companies that you’re getting quotes from and make sure that they are all highly rated with a proven track record. The last thing you want is a poorly done job that could cause more harm than good, requiring additional costs.

Another risk associated with selecting the cheapest option is low-quality materials, unskilled and/or underpaid installers and questionable work ethics. It’s important to understand the value of what you are paying for and make wise decisions. When your floors aren’t properly installed with quality materials, they aren’t going to last very long.

Use a More Affordable Wood

While we talked about the importance of quality materials, there are lots of types of wood out there that cost less and still last for years to come. Many types of wood look very similar and are of similar thickness but cost less than the original type of wood that it is imitating. It’s something that more people can benefit from exploring. Options like engineered wood, luxury vinyl plank, and plywood look great and don’t break the bank.

Remove Carpet and Move Furniture Yourself

source: Unsplash

If you currently own a carpet, part of a flooring installation job will involve ripping up your carpet in addition to clearing the room of furniture. Since these are things that you can do yourself, you can save some money here.

No, it doesn’t take any special skills to rip up a carpet. Moving your furniture is easiest done with the help of a few friends. You simply need some determination and strength, and time of course. Staples from your carpet can have a frustrating way of sticking around so try to pick them all up to make the job as easy as possible for contractors who later will install your floors. Carpet on your steps is harder to remove and will take a bit longer.

Remove The Existing Floor Yourself

If you do decide to rip up the carpet and clear furniture out of the way, you might as well get rid of the existing floor. The amount of work that this will require is dependent on the state of your home and the size of it. Make sure you watch a DIY guide or two on this first so that you don’t damage anything. To make things easier, a lot of people in this position will rent equipment to help with the process. It depends on what type of floor you originally had. Doing all of this can seriously help with lowering the cost of your next flooring job.

Set a Budget

source: Unsplash

If you set a budget for yourself and stick to it, you can ensure that you don’t spend any more money than you are comfortable with. Sure, it takes a lot of self-discipline, but that’s always a given when it comes to taking steps to save money with anything.

If you aren’t in a rush, you can start by dividing your home into several different zones. Using your budget, schedule a timeline for when you expect each zone to be finished. Start with one at a time so it’s less of an impact on your savings at any given time. Maybe you can learn a thing or two during the completion of each zone to make the next one more affordable.

Other Alternative Materials

Don’t overlook this one. There are actually a lot of alternative materials that you can use to save money on your next flooring job. For example, you can use reclaimed flooring. Some of the best-looking homes out there use reclaimed wood in their floors.

If you’re ordering materials yourself, it’s best to look at websites where the company has a bulk amount of a certain type of wood in stock. Companies always want to move inventory, and if they have an excess amount of a certain type of wood, a cheaper price can often be negotiated.

In addition, a lot of factories sell their lesser-desired wood for a much lower price. These “manufacturer seconds” are perfectly fine most of the time. Just be sure that you order extra product because it’s possible that you might be given some unusable boards.

Final Thoughts

Your next flooring job doesn’t have to break the bank. If you follow the tips in this blog post, you are sure to make some breathing room for yourself. 50% of our floors are sold to contractors or families who will install their own flooring. We love helping DIYers and can assist you throughout the installation process. If you’re in Colorado and are in need of services relating to hardwood floors, we are here for you. You can talk to us about your budget and our team will help find a solution that works for everyone.

Reach out today.

Should You Use Waterproof Flooring?

When it comes to flooring, there are a variety of different options to choose from. Waterproof flooring is a great option for bathrooms and kitchens with a high risk of water damage.

Typically made from either laminate or vinyl, or a combination of the two, it’s not really known for being high quality. It can get the job done, but there are reasons why you are often better off going with something else. In this article, we will go over both the positives and negatives of waterproof flooring and if it’s something you should be using in your home or business.

What is Waterproof Flooring?

As previously mentioned, there are a few different types of materials that it can be made from, but they’re all constructed similarly. They’re a type of multi-layered synthetic flooring that usually comes in the form of planks or tiles. Due to the floor being synthetic, the design on the top doesn’t have to resemble wood at all. Anything can be printed on them. This print layer has a wear layer over it that prevents the design from being worn off and provides most of the actual waterproofing.

Positives of Waterproof Flooring

There are a few different positives that are worth mentioning about waterproof flooring.

Resilience

Hardwood Flooring

source: unsplash

This type of flooring can be very resilient, at least in the medium term. As long as you’re regularly sweeping, using a mop when needed, and maybe the occasional cleaning solution to return the shine to the boards, you will find that waterproof flooring is rather durable.

Comfortability

To some, the flooring is more comfortable than stone or hardwood, having a more padded feeling to the foot thanks to its construction usually including a layer of foam or felt. This same construction also allows the floors to maintain a more even temperature throughout the year. It can also be easier to stand on for long periods of time. You won’t be freezing your feet if you decide to walk to the kitchen in the middle of the night in the winter.

Affordability

It is surprising how affordable and easy it is to work with. In most cases, it’s the cheaper option to go for as opposed to traditional hardwood. You can scale your costs to your needs, buying anything from simple peel-and-stick squares, all the way up to high-quality luxury vinyl tile (LVT) that’s almost indistinguishable from what it’s imitating. If you’ve never installed flooring before, laying down vinyl flooring and the like can be much easier than installing wooden planks.

Negatives

Unfortunately, waterproof flooring does have its disadvantages.
Resilience (Again)
The previously mentioned resilience of waterproof flooring is a double-edged sword. While it indeed does last a good number of years, it has a rigid lifespan that cannot be extended by much.

The condition of it can really only go down until eventually it completely deteriorates, requiring the need for you to replace your floors entirely. Unlike wood, you can’t do anything like sanding down a scratch or making a new layer, as you would be cutting past the wear layer and destroying the design underneath it, as well as exposing it to the elements and defeating the waterproof aspect of it.

How long waterproof flooring lasts can vary wildly depending on a good number of factors. It depends on how well it was installed in the first place, the thickness of the wear layer, how regularly used it is, and the quality of the vinyl in the first place. This can be anywhere from 5 to 25 years. In a home with a lot of activity, expect to be on the lower end of this range. Remember that if you damage the flooring, you need to replace it. It’s unlikely that you’re going to be able to completely repair anything more than simple scratches without making it worse.

Resale Value

Hardwood Floor Grain

source: unsplash

This leads into the next point, that there is next to no resell value to be had for reused vinyl, let alone for the value of the house itself. Unlike hardwood and tile to a point, once vinyl is past its life span, that’s it. It needs to be thrown out. As a result, you may find that it may even decrease the value of your home by having it installed.

Buying more expensive vinyl with thicker layers and better materials can help, but at a certain point the cost benefits just begin to wear out and you’d be better off just buying stone flooring or the like.

Environmental Impact

Another complication with waterproof flooring is the negative environmental impact the manufacturing process has. They use toxic chemicals that may even stick around in the plastic afterward. These can then create harmful gases right into your living space. It should be noted that the companies manufacturing the flooring are aware of this and have taken many steps to reduce the number of toxic chemicals.

If you decide to get waterproof flooring, you will want to make sure you get ones that have low concentrations of these gasses, though none of them will be completely free of them. You will want to look at the FloorScore certification to see what flooring has the lowest VOC, or Volatile 5 Organic Compounds.

Subfloor Complication

Subfloors are another issue to consider. In an ideal scenario, vinyl can be installed right over the subfloor without any need to modify or remove anything. However, this can often be difficult, and a subfloor that is more aged may need some repairs and other extra maintenance for it to support the vinyl’s adhesive.

Care should be taken for the subfloor to be completely free of any loose particles over where the adhesive will go, as these can easily weaken the glue. Even worse, you will likely see those particles straight through the vinyl due to how thin and flexible it is.

Final Thoughts

Waterproof flooring certainly has its uses. It is cheap, easy to install, can come in just about any shape, color, and design, not to mention its namesake of being waterproof. That said, there are quite a number of tradeoffs that should give you a pause. It often doesn’t last as long as you’d want it to, there’s no easy way of repairing it once damaged to any significant degree, and it generally doesn’t offer the same value to your home that something like stone or wood does. You may find that a different type of flooring would give you a lot less of a headache.

If you’re in Colorado and in need of anything to do with hardwood floors, we are here for you.

Contact us here to get started.

Douglas-fir: Exceptionally strong and abundant

Douglas-fir (Pseudotsuga menziesii) is one of the premier species of the Western forests. Not only is the wood exceptionally strong for its weight, but the trees are abundant. Trees can grow over 250 feet tall (with the first 150 feet free of knots and branches) and over 6 feet in diameter. Some trees are well over 800 years old.

Certainly, harvesting of some of these “old-growth” trees today must be done cautiously to avoid environmental damage and avoid depleting the forests of these icons. However, forest fires in recent years, brought on in part by poor forest management in the past years, have raised questions. Should we remove trees before they burn? If so, how many? 

Much of the Douglas-fir lumber today is coming from trees under 100 years old, which are called second-growth. Lumber properties may not be as high as with old growth, but the wood is still a superior product–strong, clear, nice grain appearance, good processing characteristics and so on. Most uses for Douglas-fir today capitalize on the wood’s high strength, yet the beauty of this wood makes it favored for millwork, furniture, cabinets and flooring.

Douglas-fir has two varieties: Coastal Douglas-fir, coming from British Columbia to California, with the best growth west of the Cascade Mountains, and Interior Douglas-fir coming mainly from the Rocky Mountains. Most wood processors prefer the Coastal variety, as it is stronger, stiffer, clearer (free of knots), and processes better. Data shown here is for Coastal. Clear wood is desired for its high strength and consistent look, and so is quite expensive.

Processing suggestions and characteristics
Density. Douglas-fir has a green specific gravity (SG) of 0.45. At 6 percent MC, the SG is 0.50. The weight, when dry, is 32 pounds per cubic foot or about 2.0 pounds per board foot (planed to 3/4-inch thickness). Most Doug-fir lumber will be sold dried and planed (S4S, surfaced 4 sides). 

Strength. For dry wood, the ultimate strength (MOR) is 12,400 psi, stiffness (MOE) is 1.95 million psi and hardness is 710 pounds. Douglas-fir, when quite dry, does have a tendency to split, so predrilling of holes for large-diameter fasteners might be required at times.

Drying and stability. The wood dries rapidly with little risk of quality loss. Most suppliers will sell only KD stock, rather than green. Shrinkage in drying is fairly low. Overall shrinkage from green to 6 percent MC is 6.9 percent tangentially (the width in flatsawn lumber) and 3.8 percent radially (the thickness of flatsawn lumber). Once dried, the wood does not move much even with large RH changes. A typical, desired, final moisture range is 9 to 10.5 percent MC. This final MC range, although high for hardwoods, facilitates machining. Once dry, it takes a 4 percent MC change to result in 1 percent size change tangentially and 7.5 percent MC change radially. 

Machining and gluing. This wood machines well, unless the MC is too low (under 9 percent MC). This wood glues without much difficulty.

Grain and color. The color of Douglas-fir varies from a reddish color to yellowish. The color darkens somewhat when exposed to light. Light earlywood and darker latewood gives the wood an obvious heavy grain appearance. 

This post appeared first on http://www.woodworkingnetwork.com

Why Is My Hardwood Floor Creaking?

Hardwood floors are known for their long-term durability. Even so, they’re not immune to age and general wear and tear. Whether from constant use or just from growing older, you will find that eventually the boards will start to creak. In this article, we will discuss everything you need to know about creaky floors so you can decide for yourself if you have an issue that needs addressing.

What Causes Squeaky Floors?

There are a wide variety of completely different reasons why your floor could be squeaking. Let’s get into some reasons why this might be happening.

Seasonal Changes

As the seasons progress from one to the next, the temperature changes. In the winter, the air getting colder can cause even brand new boards to squeak a little. This is because as the cold and dry winter air, the boards will naturally contract a bit, becoming smaller. This creates tiny gaps between the boards and even the subfloor.

This contraction results in the boards being able to move more and rub against each other or even the fasteners. Seasonal squeaks are nothing to worry about and typically go away as soon as it starts getting warmer. You can mitigate this issue quite well by just keeping the humidity of the room between 40 and 60 percent.

Joist Problems

If you didn’t know already, joists are basically a small structure that sits beneath both the floor and subfloor. They are horizontal bars that help stabilize your subfloor and help prevent it from moving around. Any issues with the joists can cause the flooring to become looser and create creaking.

Some problems the joists may have include them being too loose, getting warped, or gaps forming between them and the subfloor. The easiest way to verify this is to have access to a basement below the boards and the room beneath the boards.

Subfloor Problems

Uneven subfloors are one of the most common ways that a squeaky floor can happen. When the subfloor is not level with everything else, it creates a gap between itself and what’s above it. This naturally allows for the board above it to move around and create noise. Another culprit may be that the joists and the subfloor are misaligned.

If you think that the joists may be the source of the issue, then the best thing you can do is get it repaired or replaced by a professional. Damaging your subfloor through accidental damage is a mistake you very much don’t want to make.

When you boil all this down to the simple basics, it always comes down to the fact that the board is becoming loose and moving around to some degree.

Are Squeaky Floors a Sign of Danger to the Structure?

Fortunately, creaky floors are basically never a sign that something is about to actually break. Squeaking does not mean that there is structural damage. If the floor was also bending or bowing in some way, then that would definitely be an issue, but by that point, you wouldn’t need the squeaking to see that happening anyway.

Any floor of any type can squeak, but hardwood floors and stairs are usually what it’s happening with. Squeaks happen when the house is settling after a change in temperature and the boards start to dry out and expand. This in turn causes the floorboards to start to rub against each other, the nail casings, or even the subfloor.

Thankfully, creaky floors are also typically really trivial to fix.

How To Fix Your Creaky Floorboards

Creaky Floorboard

source: unsplash

To figure out exactly where the boards that creak are, you will definitely need a second person. The reason for this is quite simple. You can’t both be on top of the boards, walking around to make them squeak, and be on the floor below to pinpoint where the board is.

An unfinished basement or crawl space is ideal for this job since it means that all you need to have on you is some carpenter’s glue or any other construction adhesive as well as a thin wood shim. All you’d need to do is smear some of the adhesive onto the shim and gently tap it into position between the joists and subfloor. If that’s not easy to do, then you can also just jam directly between the bad boards and good ones adjacent to it.

If you end up finding that the gap is too large for a shim to work, don’t fret. There’s another great alternative as well. Get your caulking gun and simply apply the adhesive between the subfloor and the joist. Once it’s all hardened, the squeaking should be a complete thing of the past.

If the cause of the squeaking is because the boards are actively rubbing against the wooden subfloor below it, there is an admittedly more tricky option you can take to fix it. Take a short wooden screw and drive it through the bottom of the subfloor and into the base of it. Take it slow and be careful, you will want to ensure that the screw does not go too far in, as you risk the bottom of the screw sticking up out of the floor where you could step on it.

For stairs, one reliable way to fix the creaking is to access the back of the stairs where you can get under them and then, using the shims and glue we mentioned earlier, tap them into the joints between the treads and the risers. If you are for some reason unable to get under the boards, then you can do this from above as well, but you will want to make sure to trim the exposed parts afterward with a utility knife. If all else fails, you could just try applying adhesive directly on top of the boards, but you will also want to do this carefully to avoid a big mess and an annoying cleanup.

Fixing Creaky Floors From Above

You will notice that we didn’t put much emphasis on doing these fixes from above. The issue is that if you can’t get below the boards, you may have some difficulty that requires more precision than you would need otherwise.

One good method is to buy either ring-shank flooring nails (recognizable from the little rings that cover it) or cement-covered flooring nails, then hammer them into the seams between the bad boards. If what’s causing the squeak is the board coming detached from the subfloor, you can try hammering two nails at opposite 45-degree angles into the joists and filling in the holes with wood filler.

Final Thoughts

The sound of creaking can be rather unpleasant. With proper maintenance, your hardwood floor can stay in top condition for as long as you let it. If you’re in Colorado and you haven’t already done so, you can get a quote on your unique flooring needs by using this link or by calling us at (800) 639-3006.

The Effect of Salt and Snow on Hardwood Floors

At MacDonald Hardwoods, we love everything to do with hardwood floors. It’s our passion and the subject we know the most about. So as hardwood lovers, we do our best to preserve our floors and teach others how to do the same. Something that not many people talk about is the effect that salt and snow have on hardwood floors. That’s what we will be discussing.

Let’s get right into it.

The Relationship Between Salt and Snow

First, you are probably wondering how exactly salt gets onto your floors and why it matters. It’s important to keep our walkways safe during the winter when it gets icy. No one wants to see their mailman trip and fall. With that in mind, it’s become common for homeowners to sprinkle rock salt onto their walkways in advance of snow.

This works great and the walkways become safe to walk on. However, a side effect is that when the snow melts you can no longer see the salt. That is until it is tracked into your home from everyone’s shoes. By the time you realize what’s going on, your floors are already damaged.

How Does Salt Damage Hardwood?

hardwood floor with salt damage

source: unsplash

The crystals that come from calcium chloride are the issue. These crystals can really damage a hardwood floor finish. At a microscopic level, you would see small, rough-edged particles from salt. The rough edges unfortunately are able to ruin hardwood when stepped on or dragged across the floor. Both finished and unfinished hardwood are at risk.

Salt stains often leave a white film or residue. It’s rather unsightly. So if you live in an area where it snows frequently and you have to use rock salt outdoors, you should pay extra close attention to the solutions and prevention section further down.

How Does Snow Damage Hardwood?

snow damage on hardwood floors

source: unsplash

Compared to snow, this is a bigger issue.

When snow gets onto your hardwood floors, it doesn’t cause immediate damage. Snow isn’t the real problem. But once the snow melts and turns into water, the water saturates the entire floor, and this condition is often referred to as cupping. After some time, a lot of moisture is absorbed into the underside of the wooden boards, which then expands the bottom of each board more than the top. As a result, the hardwood takes on a wavy appearance in addition to each course of wood being raised at their seams.

Water-damaged hardwood more often happens due to leaks rather than just tracking in snow. However, snow is still able to cause damage when the source is snow from your roof. On your roof, when the snow melts into water and then freezes into ice, this is a serious problem that can lead to something called ice damming. Ice dams form at the edge of a roof and prevent water from draining off the roof, which leads to the water having to back up behind the dam, leading to leaks inside your home. This happens because the water that gets stuck finds cracks and openings in the exterior of your roof covering which is the entry point into the home.

When dealing with this issue, the most challenging part is waiting for the floors to dry out, knowing that there isn’t much you can do at the moment. If you are lucky and your floors are cupped like a washboard, they have the unique ability of being able to flatten out over time, which means you can avoid replacement. Most people have to wait a week for the water to dry out, which is then a good time to call in a flooring contractor.

The flooring contractor will perform a moisture test, and depending on the result, you may have to wait a few extra weeks because of how long it takes the water to dry. There isn’t much of anything to be done during this time. But after the moisture readings are consistent throughout the whole room, the process of repair or refinishing can begin.

It’s very important that your contractor doesn’t sand your floors before the floor is completely dry. If they do it anyway, you will unfortunately be left with something called crowning, which is basically the effect of cupping but in reverse.

If you don’t address potential water damage to your hardwood, the structure of your home can be at risk due to the growth of mold. Mold grows and spreads very quickly and will eat away at anything in its path.

Solutions and Prevention

It’s not the end of the world (at least not yet!). If you’re quick enough to react, you can usually get away with not having to pay for replacement hardwood when there is damage from salt and or snow.

Put a heavy rug in front of your door and in the doorway. Rather than salting the outside of your door, having rugs in place is extremely valuable. Wipe your shoes on the rugs.

Knock snow, salt, dirt, and other particles off your shoes before entering. Most people have something near the door that they can kick a few times. The force of the kick is able to get rid of most unwanted things.

Remove shoes upon entry. In most of the world, this is common sense. But here in America, most people wear their shoes anywhere in the home. With respect to the longevity of your hardwood, this is a big no-no.

Have waterproof mats available at the door. Once you’ve kicked nasty things off your shoes, and wiped them on the rug, you should then remove your shoes and put them onto a waterproof mat where they are able to safely dry out.

Have water-absorbent cloths nearby. The entrance of your home is where most issues start, so you should have cloths or towels at the door ready to wipe up any excess snow, dirt, water, etc., as needed.

Vacuum your hardwood floors regularly. You already are familiar with vacuuming carpet, but hardwood can also be vacuumed. This is a great way to get rid of salt, sand, dirt, and even water in some cases. It’s best to have a vacuum made for hardwood floors.

Have a roofing contractor come by during the winter. Your roofing contractor will easily be able to identify ice damming or the potential of it and find solutions with you so you don’t have to worry about leaks. And if there’s no issue, which there often isn’t, it won’t cost much at all for them to come by and just spend a few minutes with you finding that out.

Use hardwood floor cleaning products. A popular DIY solution that totally shouldn’t be used is vinegar, which often leaves a residue of its own. Be careful about the products that you use!

Contact your flooring contractor for advice. Your flooring contractor will be able to figure out if replacements are needed or if sanding, refinishing, and filling in splintered or corroded areas is possible.

Final Thoughts

Overall, hardwood floors are extremely durable, especially when compared to their carpet counterparts. There are only a small amount of drawbacks, and dealing with salt and snow is one of those drawbacks. The best way to manage the issue is by preventing it from happening in the first place. And if you follow the tips in this blog post, you will definitely be able to do that.

If you’re in Colorado and you haven’t already done so, you can get a quote on your unique flooring needs by using this link or by calling us at (800) 639-3006.

Blackgum

Blackgum, also called black tupelo, tupelo gum, or just tupelo, is a tree that loves to grow in water and water-soaked soils. In fact, the genus Nyssa is the name of a water nymph. The tree grows throughout the eastern states, from Maine to Texas. Tupelo, Miss., (Elvis’ birthplace) was named after this tree. A close relative is water tupelo (Nyssa aquatica) which has nearly the same characteristics. Honey from water tupelo is highly prized. The tree in the forest is often 3 feet in diameter and 80 feet tall. Some of the trees are more than 400 years old. Unlike most trees, the tupelo trees are either male or female, with flowers being abundant on the female trees. It is not unusual for the larger, older tree to be hollow due to decay fungi; yet the tree can live with this condition for hundreds of years.

The wood itself is characterized by interlocked grain (the grain swirls every which way), which leads to warp when drying, warping in use when the MC changes, and difficulty when machining. In the past, blackgum was used for oxen yokes and chopping bowls due to the toughness resulting from the interlocked grain. Today, although this is not an outstanding, beautiful appearing species, it still is widely used for furniture, cabinets, caskets, and railroad ties. Carvers of duck decoys also appreciate this wood.

Processing suggestions and characteristics

Weight: Blackgum has a dry specific gravity (SG) of 0.52. The weight, when dry, is 32 pounds per cubic foot or about 2.6 pounds per board foot.

Strength: For dry wood, the ultimate strength (MOR) is 9,600 psi, stiffness (MOE) is 1.20 million psi, and hardness is 810 pounds. Interlocked grain means that splitting is very difficult. Nailing is also difficult, as the interlocked grain wants to change the nail’s direction. Pre-boring holes for nails and screws can be helpful.

Drying and stability: The wood dries with considerable difficulty due to warp, especially twisting. End coating is suggested, even with 4/4 stock. Shrinkage in drying is moderate. Overall shrinkage from green to 6 percent MC is 6.2 percent tangentially (the width in flatsawn lumber) and 3.5 percent radially (the thickness of flatsawn lumber). Once dried, the wood does move slightly if there are large RH changes or if the MC is not matched to the environment’s EMC conditions. A typical, desired, final moisture range is 6.0 to 7.5 percent MC. Once dry, it takes a 4.5 percent MC change to result in 1 percent size change tangentially and 8 percent MC change radially. 

Machining and gluing: This wood machines moderately well, with some chipped grain due to the interlocked grain. If over-dried, the wood appears to be quite brittle. Sharp tools are essential. This wood glues without much difficulty if surfaces are perfectly flat. However, if the MC changes and the pieces warp a small amount, it is difficult to obtain high-strength joints.

Grain and color: The wood, which is mostly heartwood, is grayish brown to a light brown with hints of yellow at times. The finished surface is smooth, but without natural luster. If the lumber is quartersawn, blackgum exhibits a very attractive figure. The wood is odorless. However, when the tree is bacterially infected, sawn wood will have a putrid odor and is noticeable (and objectionable) in dry wood products especially when the humidity is high.

This post appeared first on http://www.woodworkingnetwork.com

This website nor its owners are an actual service provider, this website is a referral service. When you place a phone call from this website, it will route you to a licensed, professional service provider that serves your area. For more information refer to our terms of service.

© WoodFloorRefinishing.info

(877) 959-3534